
|
 |
 |
 |
 |
 |
 |
 |
 |
 07-04-2008, 03:26 AM
|
#71 |
|
Kneedragger

Join Date: Mar 2008
Location: Stoneham MA
Moto: 2006 CBR1000RR
Posts: 192
|
gonna be sick dude
__________________
2006 CBR1000RR - 154 RWHP Full Akra TI Evo / Hex Canister, PC-III custom map, BMC Race filters, Woodcraft Rearsets, Pazzo Levers, OEM Cowl Seat, Flapper Mod, Sporttech windscreen Pirelli DCIII's 190/55, Flushmounts, Jardine Fender Eliminator, EBC brake pads 1995 XR250R- Dirt Toy Delta CO 181 Infantry |

|

|
|
07-04-2008, 04:37 AM
|
#72 |
|
Moto GP Star
Join Date: Mar 2008
Posts: 14,556
|
I don't doubt flames either,especially if you're using a generic map 'cause Dynojet tends towards the rich side for liability reasons. Congrats bro' I'm glad it'sall working out for you! Good call on the cf can btw carbon fiber FTW!
|
|
|
|
|
07-08-2008, 05:58 PM
|
#73 | |
|
Pompous Prick

Join Date: Mar 2008
Location: MA
Moto: 06 R6 (race), 04 CRF Tard (race)
Posts: 3,040
|
Quote:
Made huge progress on the bike a little while ago but have been to busy to post it up until now... It's pretty much done though. Mounted up the new radiator and filled with engine ice: 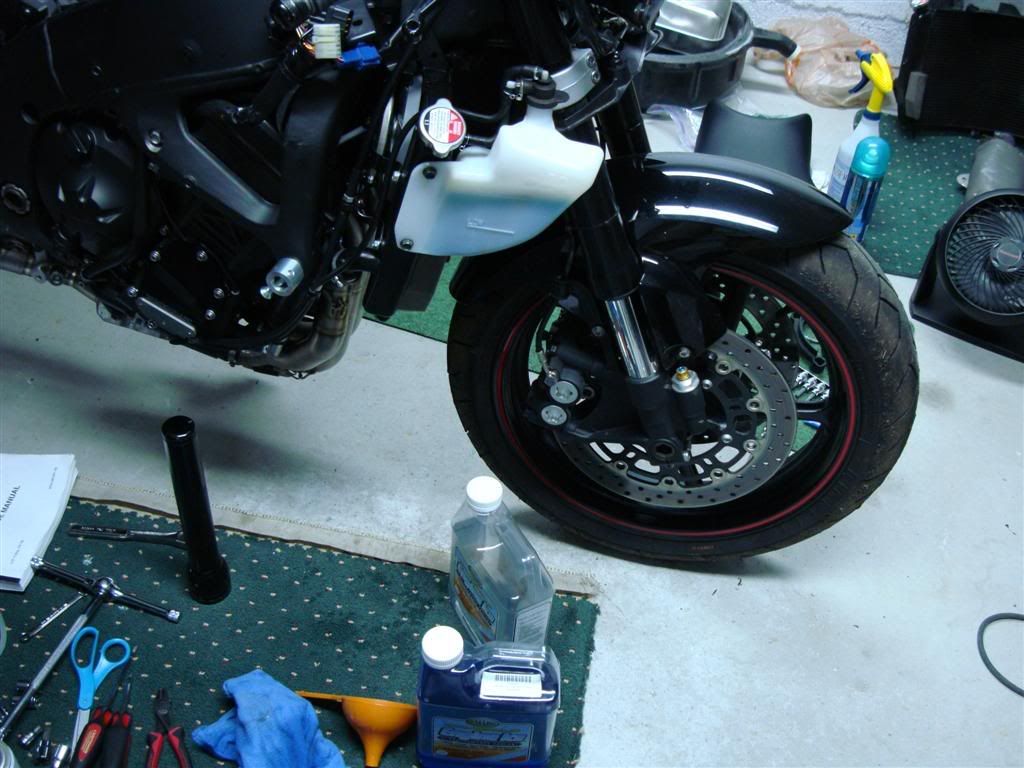 Removed the stock O2 sensor and installed the PCIII... downloaded the DynoJet map for my setup on there temporarily until I get a map: 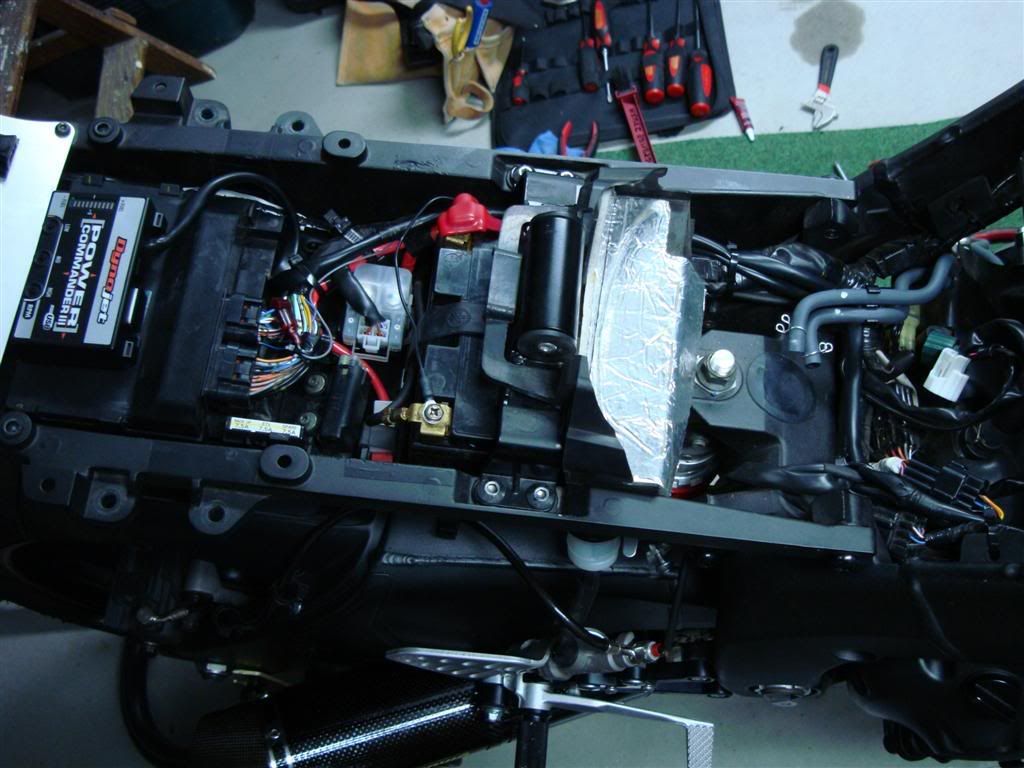 Mounted up the new gas tank: 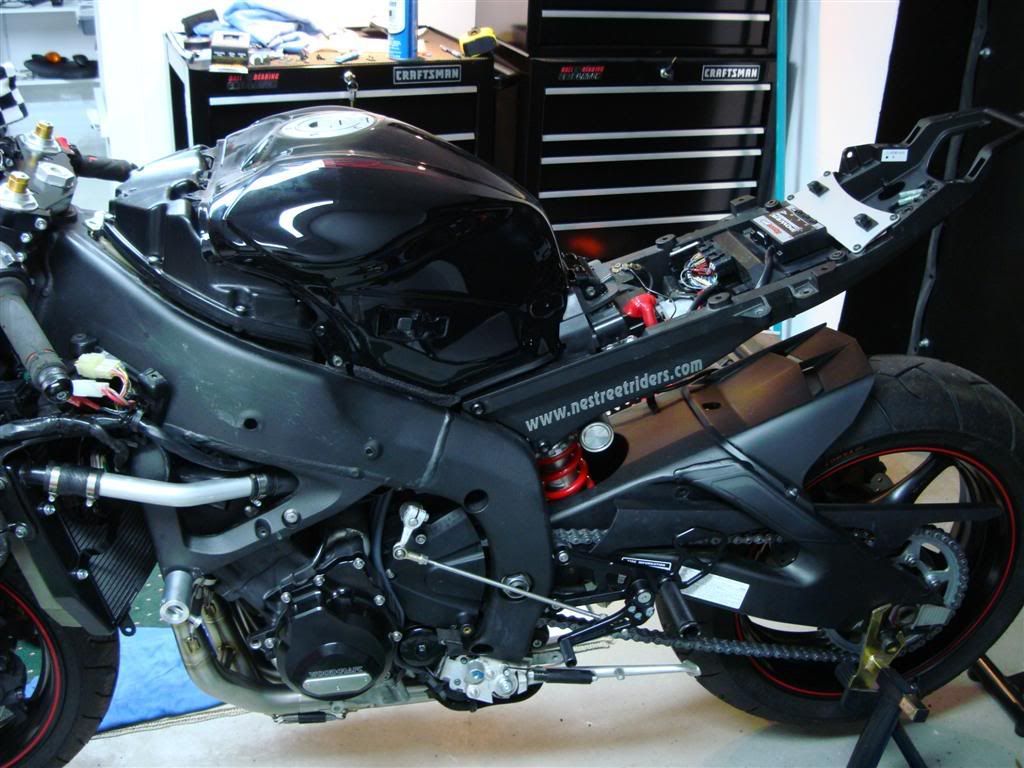 Filled her up with oil and gas, and also had to fill and bleed the rear brake since I installed the banjo pressure switch, then took her outside to start that bitch up. Started up right away, and that exhaust is SICK. Sounds great. Not to mention that since the DynoJet maps are set pretty rich, she shoots big flames on decel  I'm pretty disappointed with the sound in this video... maybe the microphone on my camera doesn't pick up the lower frequencies as well. This video doesn't do it justice at all, I plan to take another one next time I go out there... The camera doesn't pick up the deepness very well and the frame rate doesn't pick up most of the flameshooting. Anyways, here it is: http://youtube.com/watch?v=SAHLl_xkkyk Then Wednesday my good buddy Dennis helped me cut/drill/mount the race bodywork since I'd never done it before. The fit was pretty spot-on, the flexibility of the stuff is great. Mounted up: 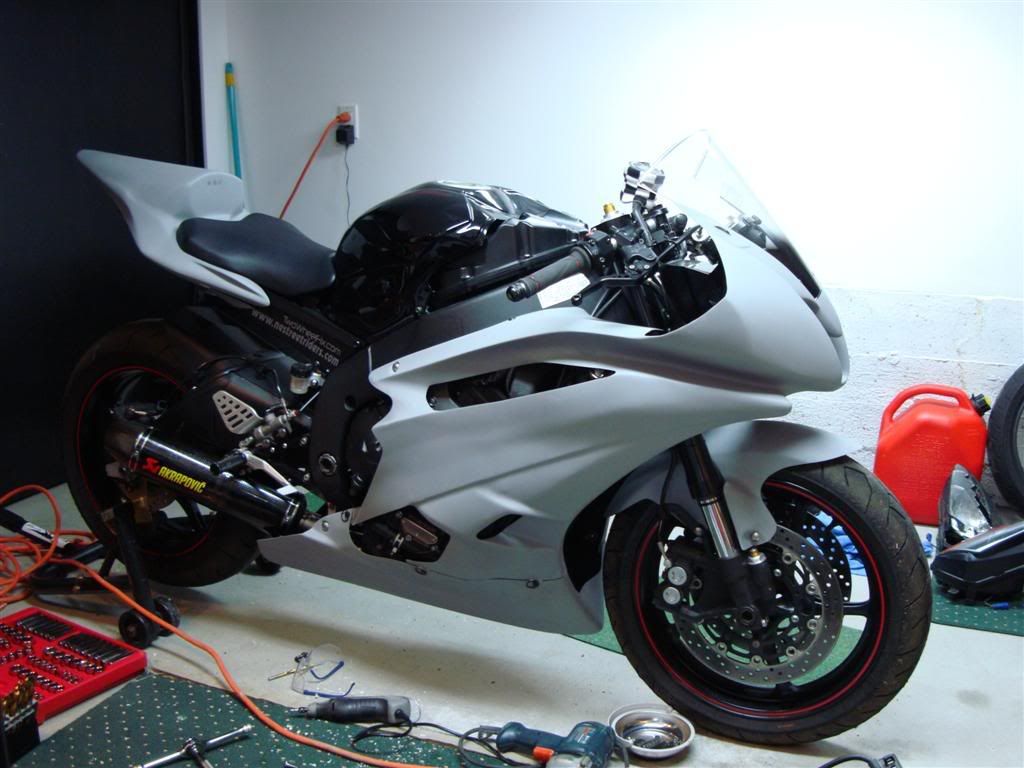 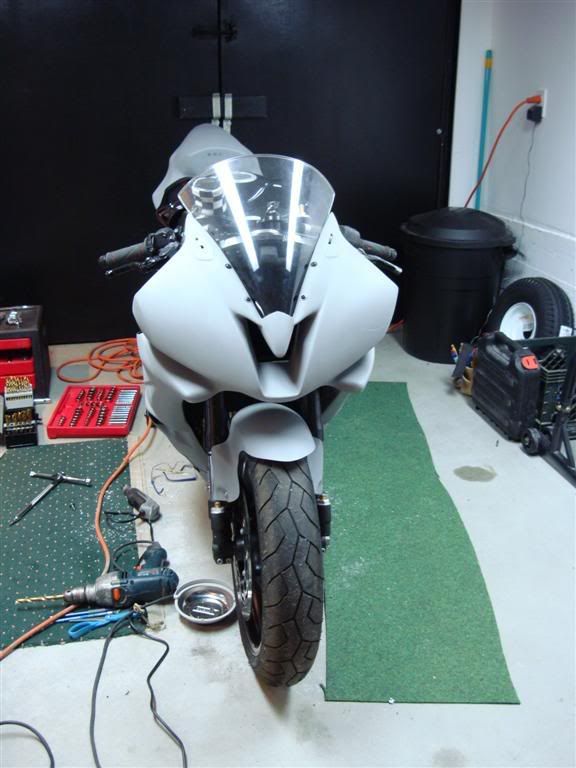 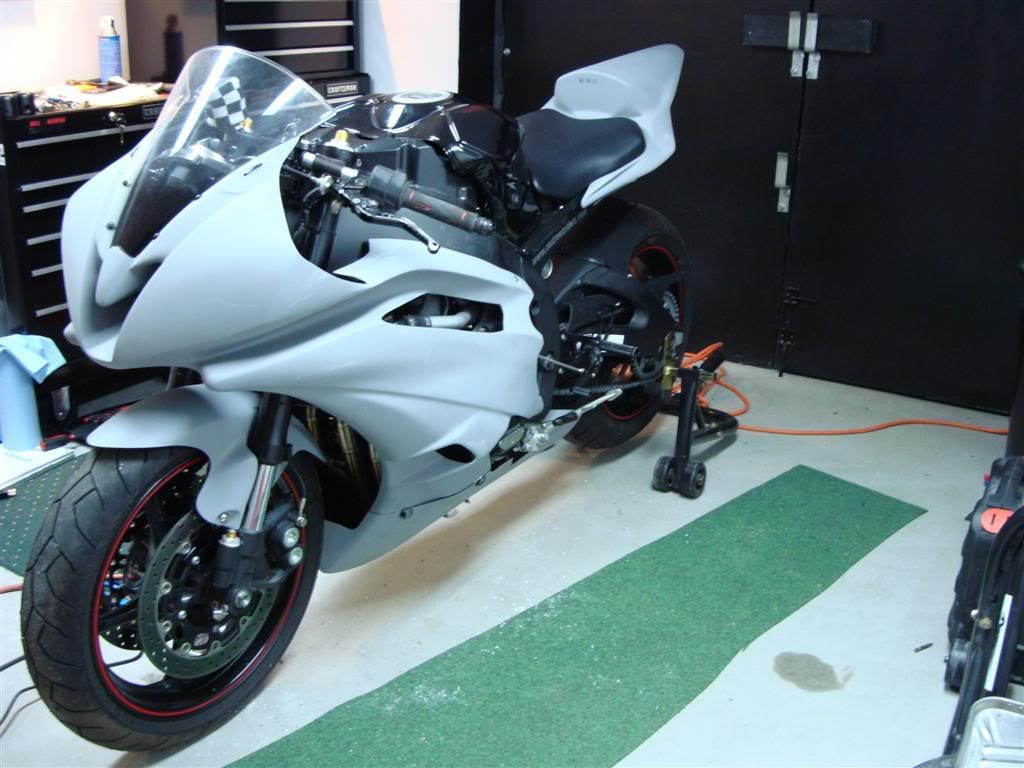 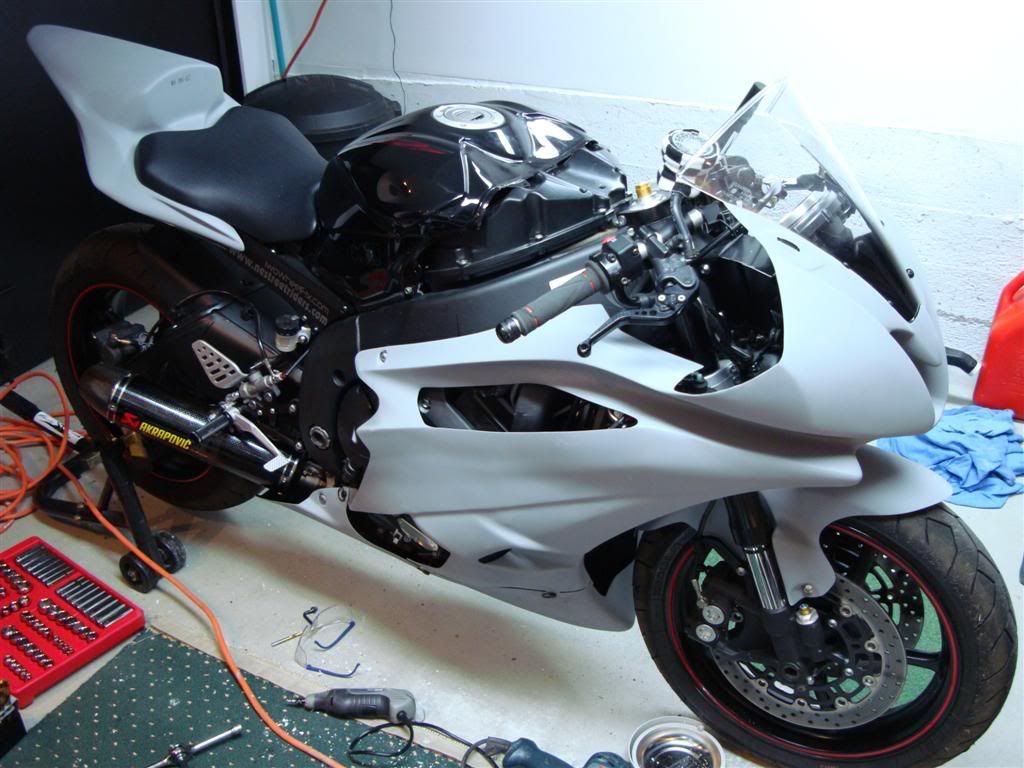 Then Dennis left and I cut spots for the frame sliders. Cut and mounted, right: 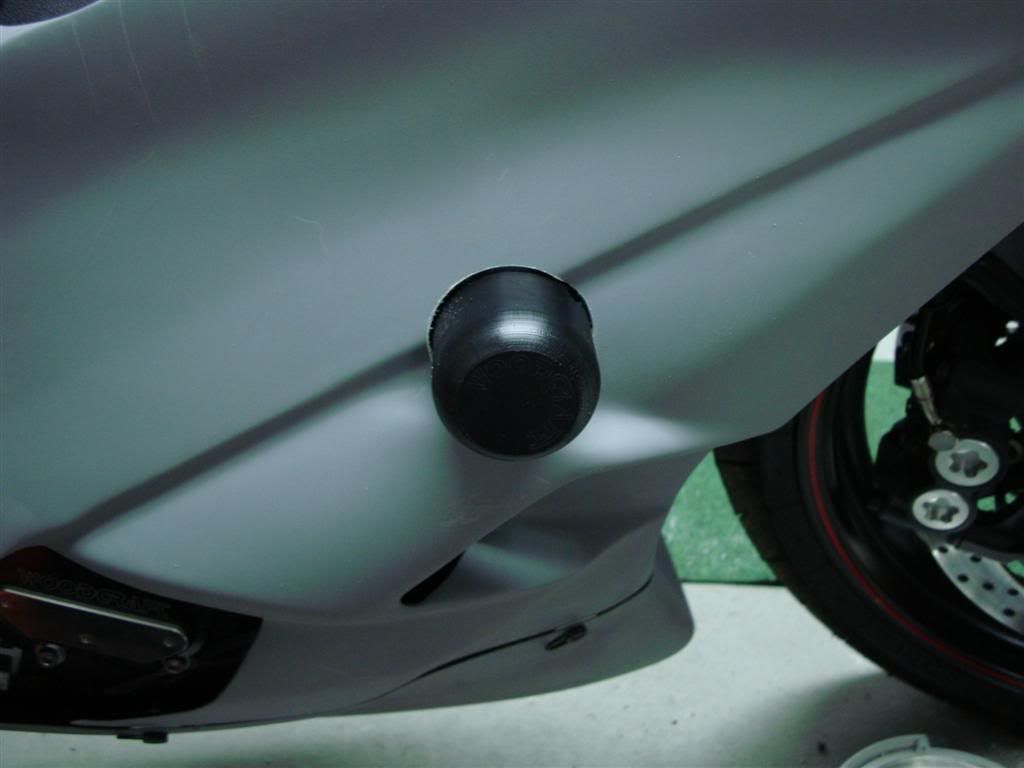 Left: 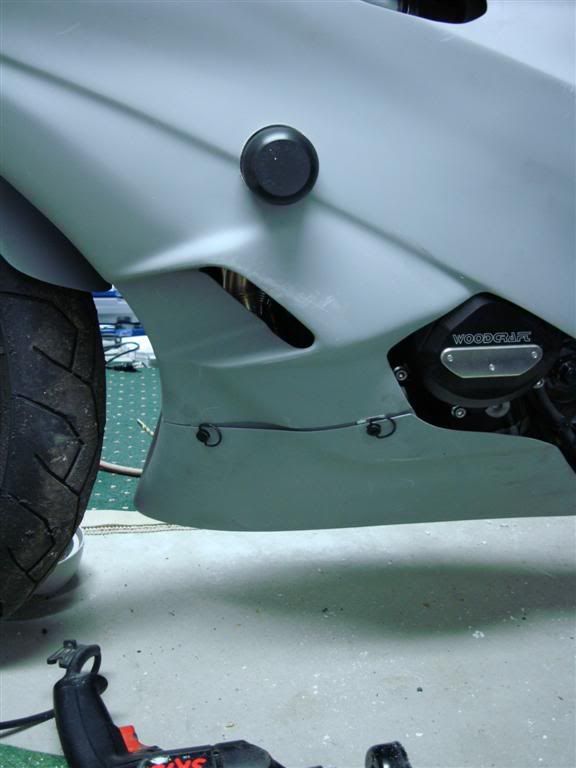 Mounted the new set of tank sliders. Looks like Traxxion went to a glossier finish of plastic which is nice, they definitely blend in more nicely now: 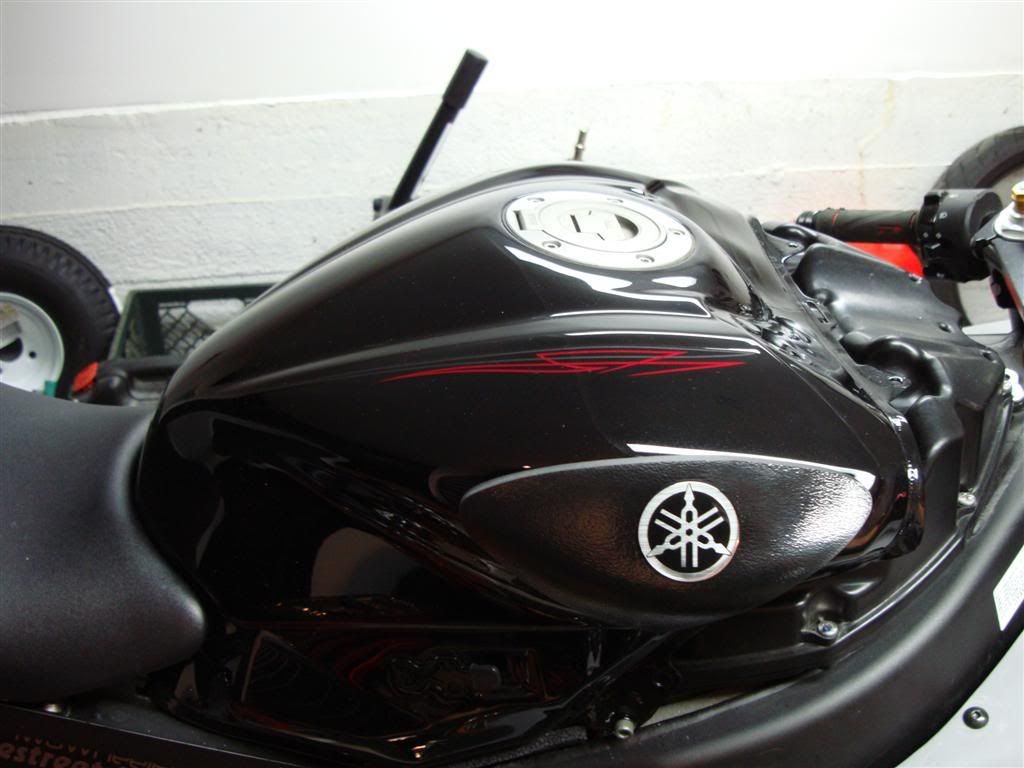 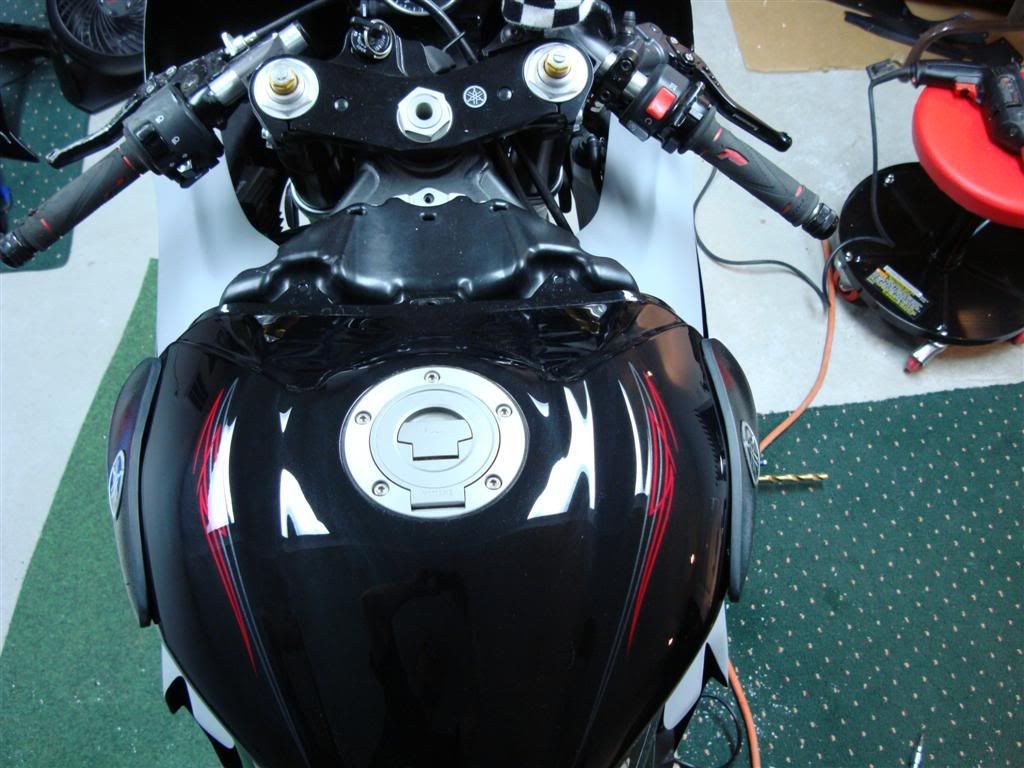 Threw on some sexy TWFix stickers as well: 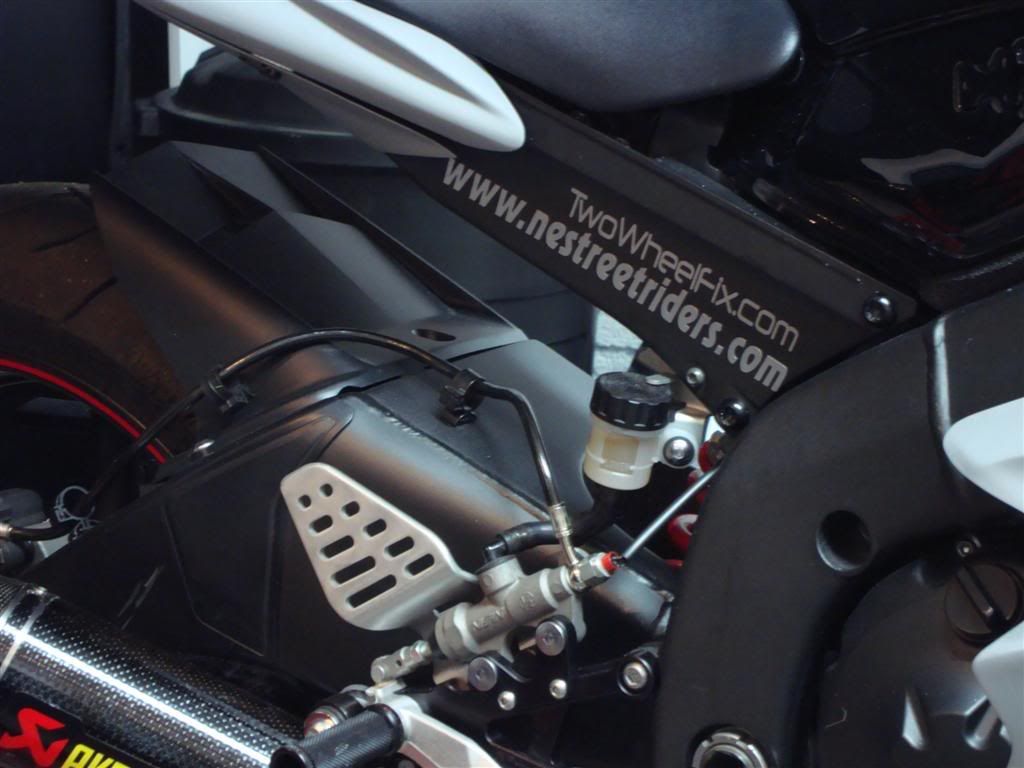 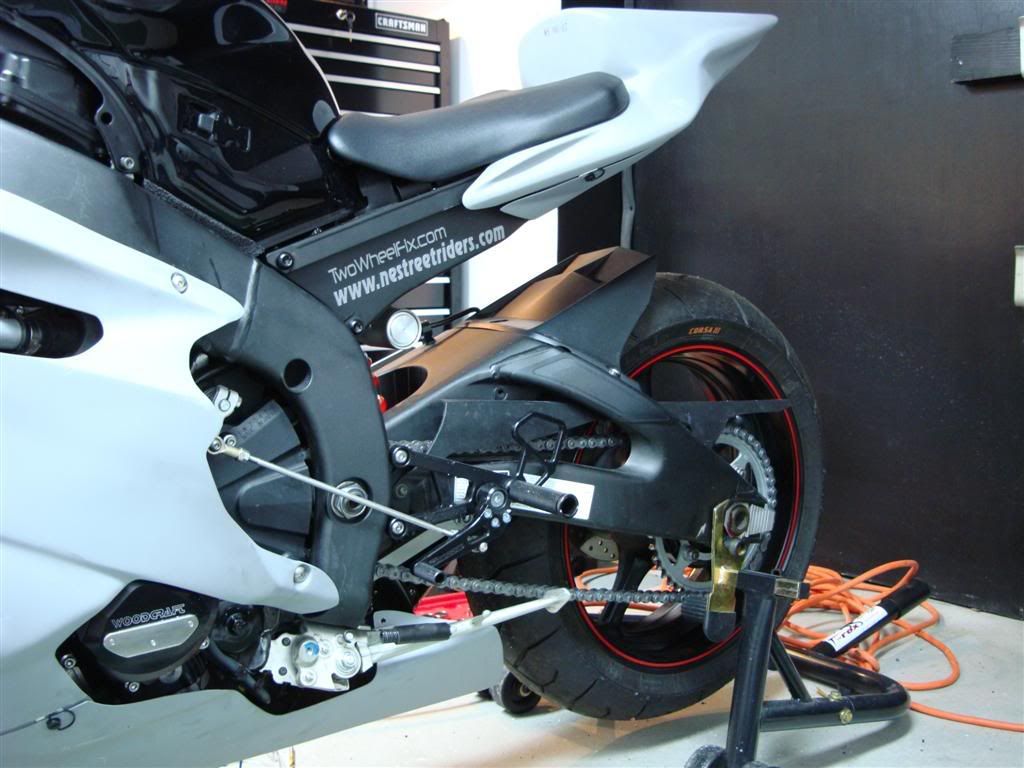 Then I took all that off and mounted up all the street stuff so I could check that all the wiring still worked, as well as cut the street fairings for the frame sliders, like so: 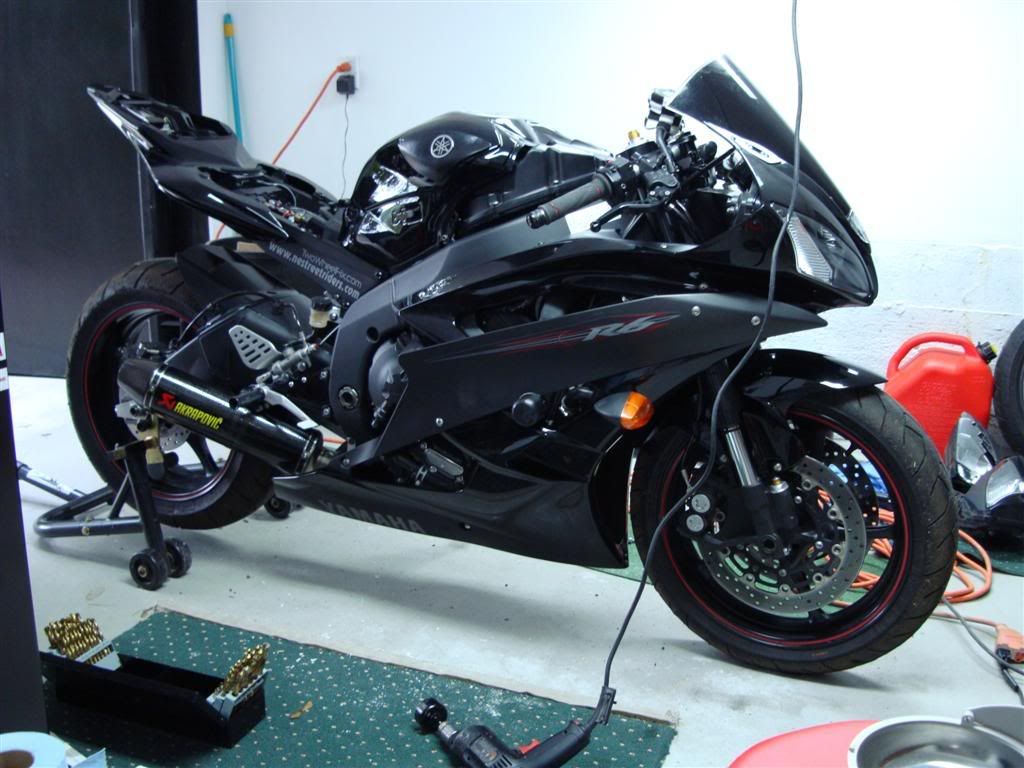 Then I stripped her all down again, and got everything I'm painting ready for paint. The full set of track bodywork, the airbox cover, my backup gas tank, the stock fender and the two midfairings: 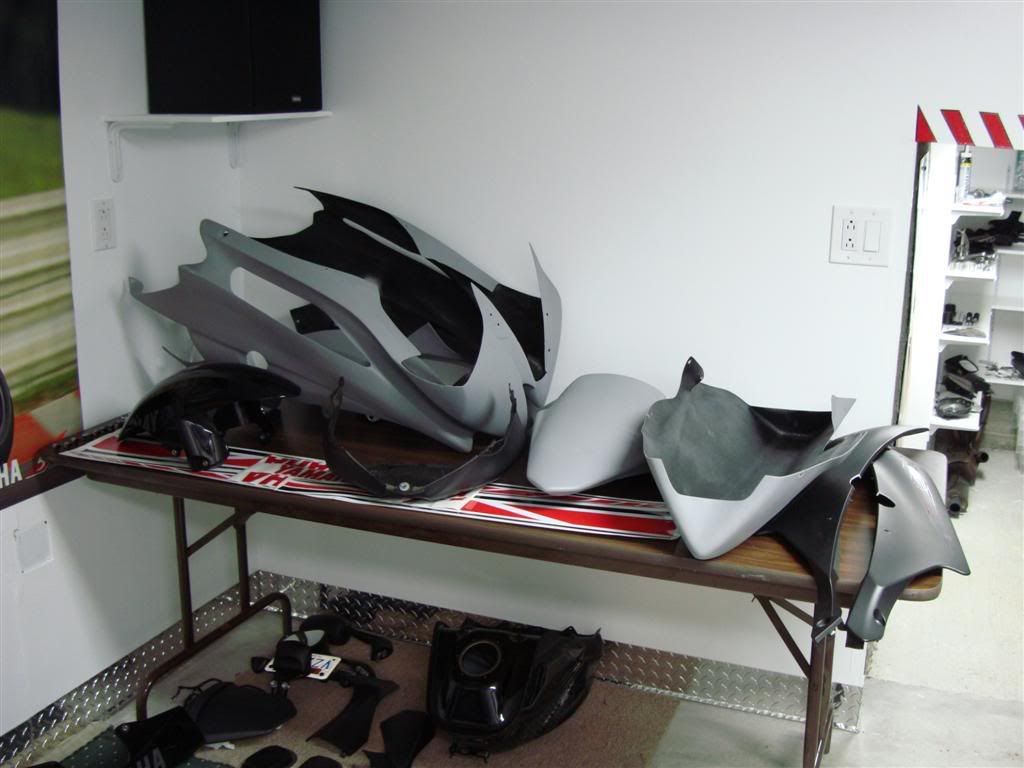 Now she's just hanging out waiting for next week's track days, as am I  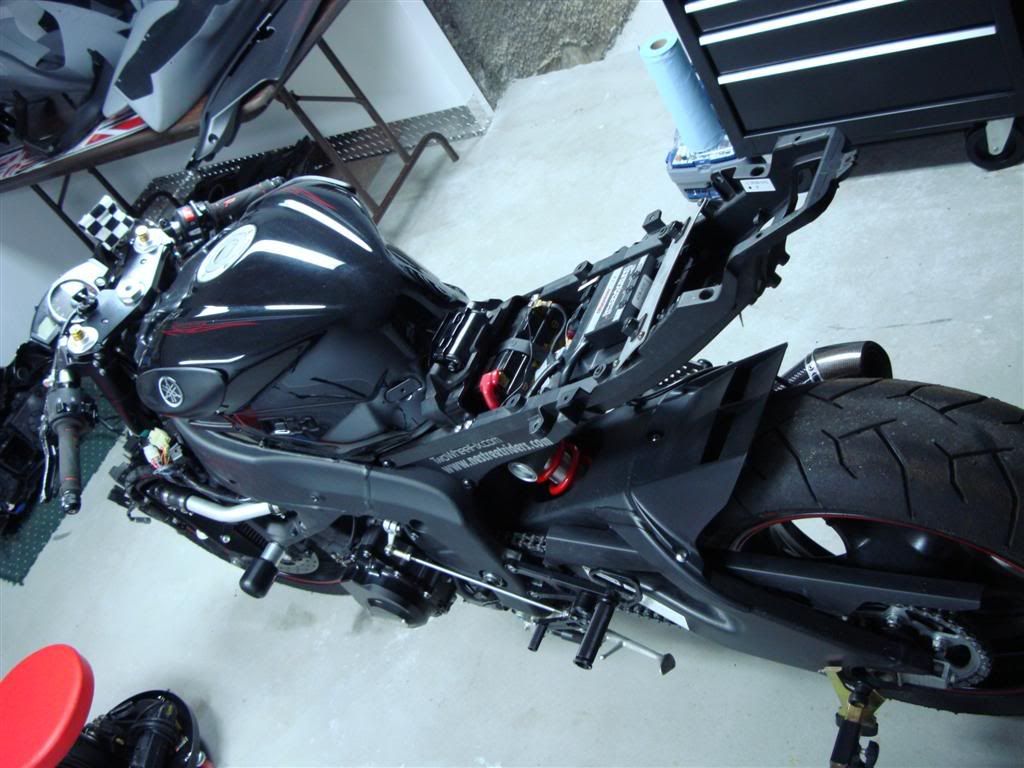 Oh and lastly since a ziptie bit the wire of my camera lens I repaired that by splicing it open and using four inline crimp bullet connectors which afterwards I wrapped all up with electrical tape: 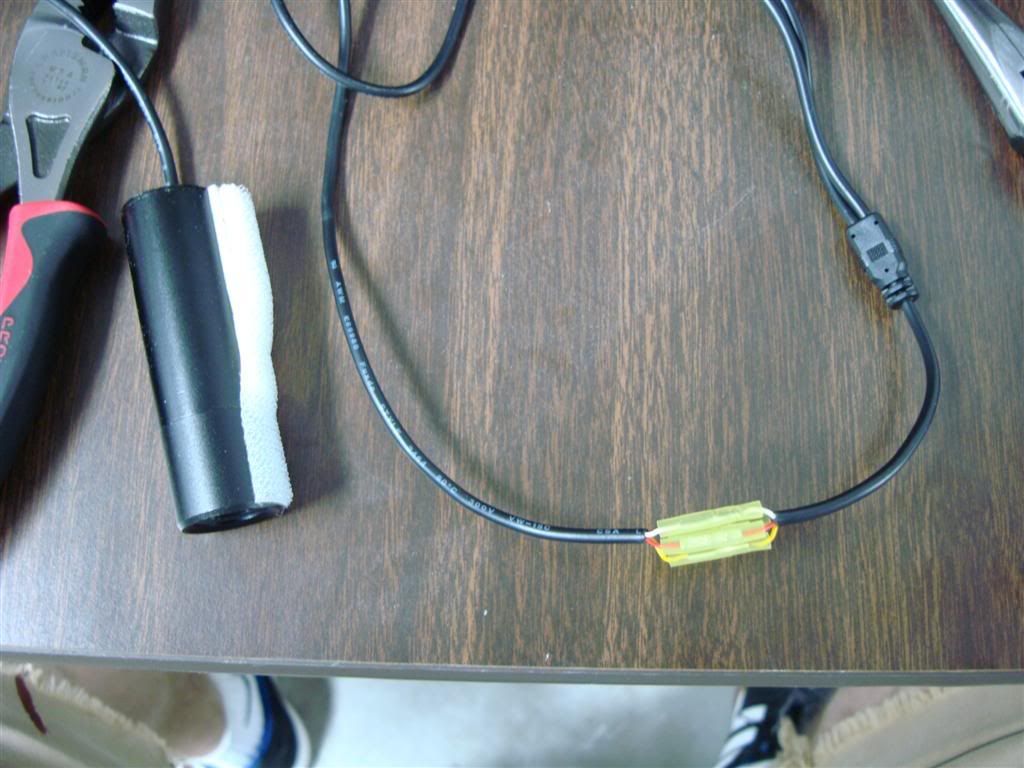 Thursday at 2pm I'm getting a dyno and custom map done for the bike. Monday on my way up to the track I'll be grabbing the bodywork. Looks like everything will be together in time... except the decals, I'll throw those on when I get back from the track. Can't wait to get her on the track. I'm psyched.
__________________
LRRS/CCS #123 Boston Moto Dunlop Woodcraft 35 Motorsports Sidi Pit Bull K&N Filters Last edited by ceo012384; 07-08-2008 at 06:08 PM.. |
|
|
|
|
|
07-08-2008, 08:36 PM
|
#74 |
|
Clit Commander

Join Date: Feb 2008
Location: Las Vegas
Moto: 2012 Ducati 1199 Panigale S
Posts: 4,189
|
Lemme see a shot of the left side's slider. I want to see how much you had to cut.
__________________
Dress for the crash. Not the ride. 
|
|
|
|
|
07-08-2008, 09:36 PM
|
#75 |
|
Moto GP Star
Join Date: Mar 2008
Posts: 14,556
|
I'll tell you one thing Motherfucker,if I EVER need sliders cut in...I'M CALLING YOUR ASS!!!!!! I don't think I've ever seen more perfectly cut sliders in my life!!! Good job! Oh and Dlit,if it's the same as my bike,they give you a sticker template to cut by with the kit.
|
|
|
|
|
07-09-2008, 04:31 PM
|
#76 | ||
|
Pompous Prick
Join Date: Mar 2008
Location: MA
Moto: 06 R6 (race), 04 CRF Tard (race)
Posts: 3,040
|
Quote:
The left requires a significant amount more cutting than the right, but it's not a big deal. The PITA that you probably haven't thought about yet is that those two side pieces slide into place, they have those little hook tabs that slide into the lower fairing... so after you cut a circular hole, you need to use a dremel to cut off some more on the rear portion of the circle... i.e. run a tangent line off of the circle. This allows you to slide the fairing in and out of place. You follow what I'm saying here? Not sure if I'm explaining it well. Also, the raw color of that plastic is light grey so you'll need to do something to it if you don't want it to be noticeable. Quote:
 No there was no sticker I just use a 2" hole saw that goes into a drill. Make sure you get the kind that has a pilot bit in the center for alignment purposes. Little alignment trick: Get a laser pointer and stack in on top of things such that it's perfectly aligned with the center of the bolt head that holds the frame slider base into the engine. Then, don't move the laser pointer at all and mount up all your bodywork. Presto! Just put the center pilot bit of your hole saw on that mark and you're in business.
__________________
LRRS/CCS #123 Boston Moto Dunlop Woodcraft 35 Motorsports Sidi Pit Bull K&N Filters |
||
|
|
|
|
07-09-2008, 07:38 PM
|
#77 |
|
Moto GP Star
Join Date: Mar 2008
Posts: 14,556
|
You sir are a genius! Thanks,I have a couple of semi-noobs I'm ALWAYS helping with their bikes and one has a R6 and the other GSXR600,both need sliders cut in and I have a laser level so no problemo! I've been avoiding that job for weeks,to tell you the truth!
|
|
|
|
|
07-11-2008, 11:49 PM
|
#78 |
|
Pompous Prick
Join Date: Mar 2008
Location: MA
Moto: 06 R6 (race), 04 CRF Tard (race)
Posts: 3,040
|
Couple updates.
First, unfortunately, it looks like the paint won't be ready for the track days this week  I had a feeling he wasn't going to have enough time so I told him if he didn't think they'd be ready to wait on even starting, since I need to ride with them for the track days, and then I'll just give them right back afterwards. No big deal. I think when I give him back the track bodywork, he'll probably have the couple street pieces I wanted done all finished, so I'll be able to come back and get her street ready I had a feeling he wasn't going to have enough time so I told him if he didn't think they'd be ready to wait on even starting, since I need to ride with them for the track days, and then I'll just give them right back afterwards. No big deal. I think when I give him back the track bodywork, he'll probably have the couple street pieces I wanted done all finished, so I'll be able to come back and get her street ready  Anyways, a couple little seams and stitches were messed up from the crash so I had Held repair them. They did a perfect job. Also picked up another seat cowl for the street, and in the back you can see my new set of ratcheting wrenches: 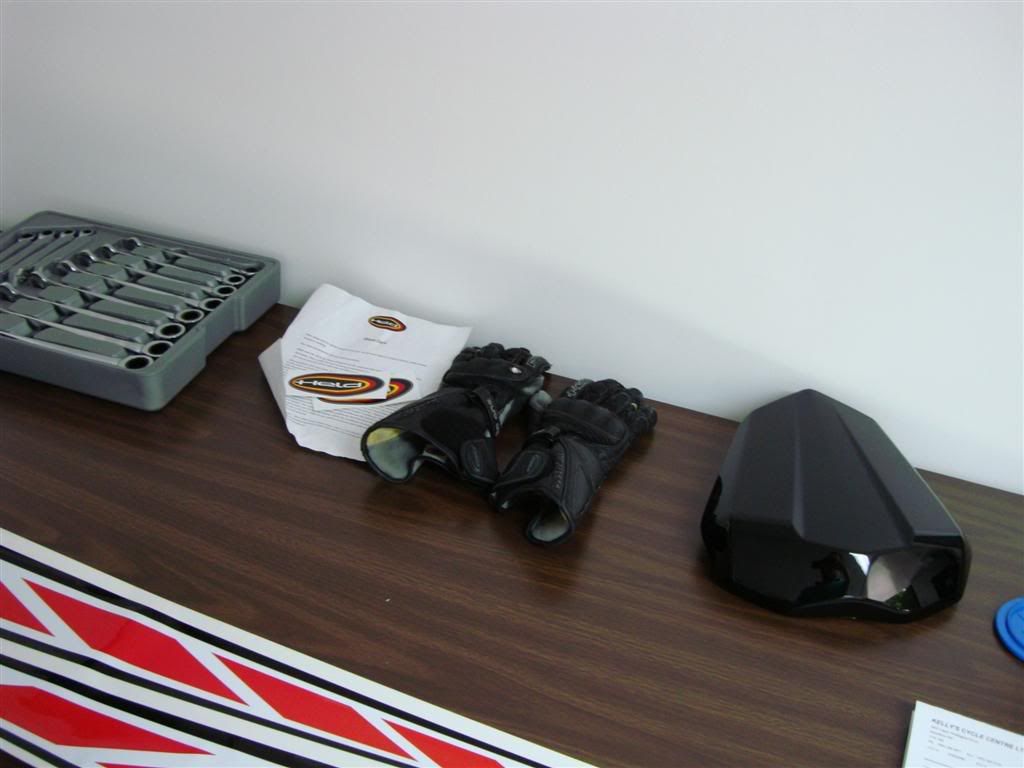 I took the bike to Rob's dyno to get a custom map for the bike. 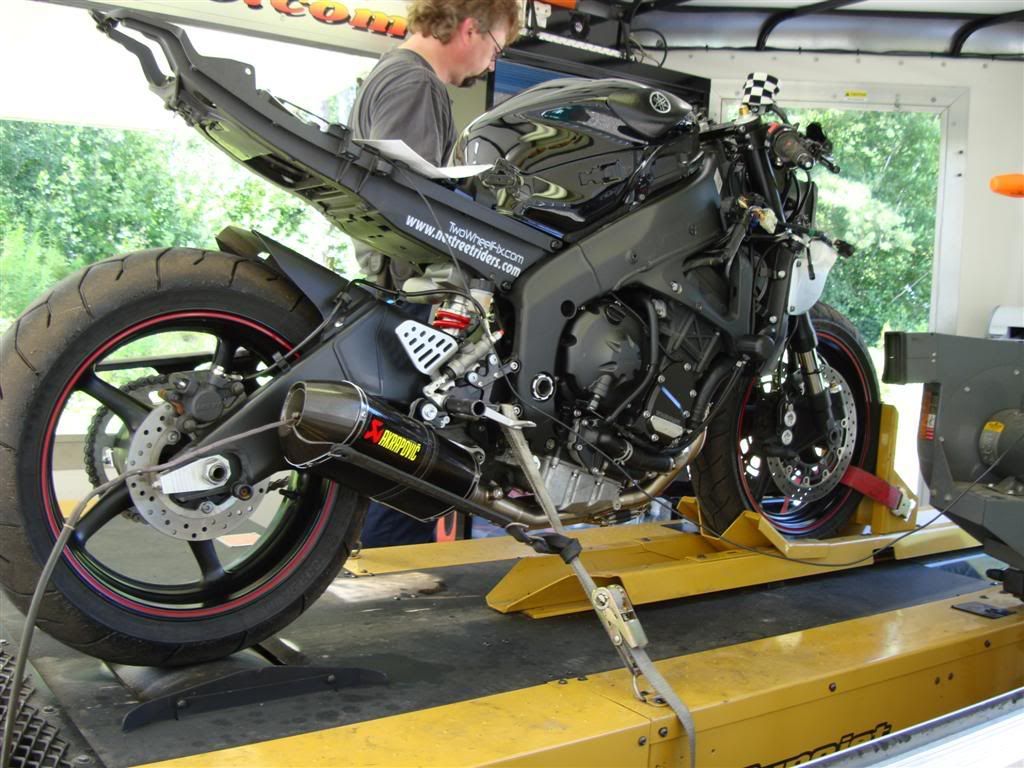 Rob's a nice guy and seems like he really knows his shit. The 2006+ R6 is a bit tricky as I understand it because the ECM won't let you open the throttle butterflies all the way below 9krpm, so you basically tune the bike to run well around the low rpms, but can't get full adjustability until then. Regardless, I don't give a shit about 9krpm and under anyways. You can see that Rob really was able to smooth out the torque curve from 10krpm to redline. Also, the A/F mixture was way too rich with the downloaded map so the result of the custom map is that it was leaned out to a proper mixture. Not that I care about the power number because it doesn't mean anything and there's no ram air anyways, but she dynoed at 106hp and 40 tq with the BMC race air filter and akrapovic full system. I thought this sounded a little low but Rob said that was a good pull for a 600 with these mods. I guess there is a ton of variability between dynos (not to mention ambient conditions) and a lot of people play number games... Rob seems to be a straight shooter and I trust the number... but what I really care about is the smooth power delivery and a/f mapping. I don't have a baseline run from before the crash either, so that REALLY makes the hp number meaningless. Once I get her on the track this week I'll see if the performance has changed. And BTW.. the akra sounded alright revving in my driveway... but on the dyno, since the engine is under load and not just rev rev revving... shit sounded awesome 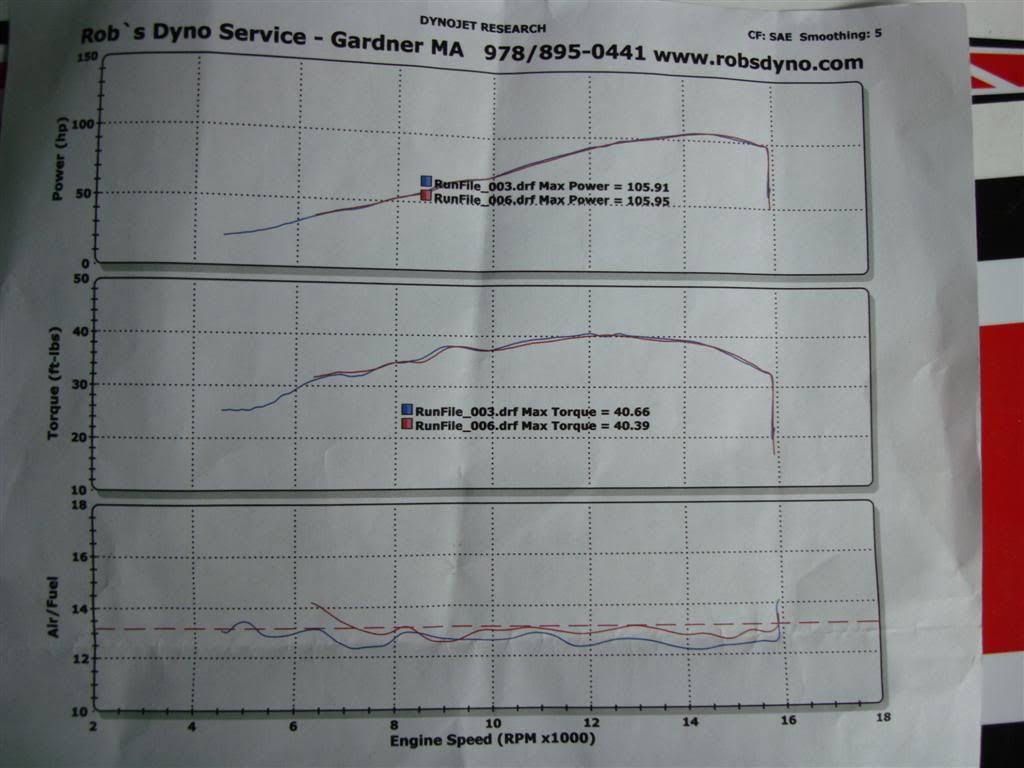
__________________
LRRS/CCS #123 Boston Moto Dunlop Woodcraft 35 Motorsports Sidi Pit Bull K&N Filters |
|
|
|
|
07-12-2008, 03:42 AM
|
#79 |
|
Clit Commander
Join Date: Feb 2008
Location: Las Vegas
Moto: 2012 Ducati 1199 Panigale S
Posts: 4,189
|
I'm disappointent to see just 106. There really is a gigantic difference between dynos. Mine dyno'd at 108 stock.
__________________
Dress for the crash. Not the ride.
|
|
|
|
|
07-12-2008, 02:51 PM
|
#80 | |||
|
Ride Naked.

Join Date: Feb 2008
Location: Flat and Straight ND
Moto: 08 BUELL 1125R, 05 SV650S
Posts: 7,916
|
Quote:
__________________
Adrenaline... the wonder drug. Quote:
Quote:
3662 Supply NCO 
|
|||
|
|
|
 |
| Bookmarks |
|
|


 Linear Mode

